
Five RESTFul Web Design Patterns Implemented in ASP.NET Core 2.0 Part 2: HATEOAS
Hypertext as the Engine of Application State
Part of the series: Five RESTFul Web Design Patterns Implemented in ASP.NET Core 2.0
This is the second part in a multi-part series on Web API design. Here is the full list for easy navigation:
- Intro and Content Negotiation
- HATEOAS (this one, silly)
- Exceptions
- Concurrency
- Security
- Bonus (because I said it would be five): Swagger
The main reason I include HATEOAS in my web design courses is because it’s such a cool acronym. There is another way to describe it. The alternative is just as cool, because as a vegan with superpowers I appreciate that using the Richardson Maturity Model support for “Hypermedia Controls” gets you to Level 3. Sounds good to me! (Hint, those links take you to places that describe it in far more detail than I do here using heady prose and smart words).
The simple way I like to explain HATEOAS is that each response provides the answers to, “What can I do next?” For example, if you request a “to do” item and have access to update or delete it, the corresponding actions and resources are returned as part of the response. The response might look something like this:
{
    "value": {
        "id": 1,
        "name": "Write this blog post",
        "isComplete": false
    },
    "links": [
        {
            "rel": "self",
            "method": "GET",
            "uri": "http://localhost:1234/api/todo/1"
        },
        {
            "rel": "update-todo",
            "method": "PUT",
            "uri": "http://localhost:1234/api/todo/1"
        },
        {
            "rel": "delete-todo",
            "method": "DELETE",
            "uri": "http://localhost:1234/api/todo/1"
        }
    ]
}
The object is encapsulated in the “value” property and the navigation in the “links” array. One way to implement this is to create a helper class that uses generics to “wrap” the type you are dealing with.
public class Link
{
    public string Href { get; set; }
    public string Rel { get; set; }
    public string method { get; set; }
}

public class LinkHelper<T> where T: class
{
    public T Value { get; set; }
    public List<Link> Links { get; set;}

    public LinkHelper()
    {
        Links = new List<Link>();
    }

    public LinkHelper(T item) : base()
    {
        Value = item;
        Links = new List<Link>();
    }
}
Instead of always returning “level 3” responses, the example here looks for a special “extended” media request. The client needs to Accept a type that is suffixed with the hateoas request in order for the server to deliver it. For example, a JSON-formatted HATEOAS response is requested with a header value of application/json+hateoas indicating it is “extending” the base type for JSON with the HATEOAS format. The controller method queries the request header and returns the appropriate wrapped response.
To make life easier, provide a Name for the methods defined in your controller. For example, this is the attribute for the GetById method:
[HttpGet("{id}", Name="GetTodo")]
Naming methods like this empowers you to easily generate a link using the Url helper class. For example, this snippet generates the link to grab the “to do” item with an identifier of 2:
Url.Link("GetTodo", new { Id = 2 })
Pretty simple, no? Here’s some code that pulls it all together.
public IActionResult GetById(long id,
    [FromHeader(Name="Accept")]string accept)
{
    // code ommitted for brevity
    if (accept.EndsWith("hateoas"))
    {
        var link = new LinkHelper<TodoItem>(item);
        link.Links.Add(new Link {
            Href = Url.Link("GetTodo", new { item.Id }),
            Rel = "self",
            method = "GET"
        });
        link.Links.Add(new Link {
            Href = Url.Link("PutTodo", new { item.Id }),
            Rel = "put-todo",
            method = "PUT"
        });
        link.Links.Add(new Link {
            Href = Url.Link("DeleteTodo", new { item.Id }),
            Rel = "delete-todo",
            method = "DELETE"
        });
        return new ObjectResult(link);
    }
    return new ObjectResult(item);
}
The process isn’t highly automated because the implementation details for a given end point may vary from controller to controller and even method to method. Therefore, the burden is on the developer to provide the navigation. After the code is in place, running it yields a result like this:
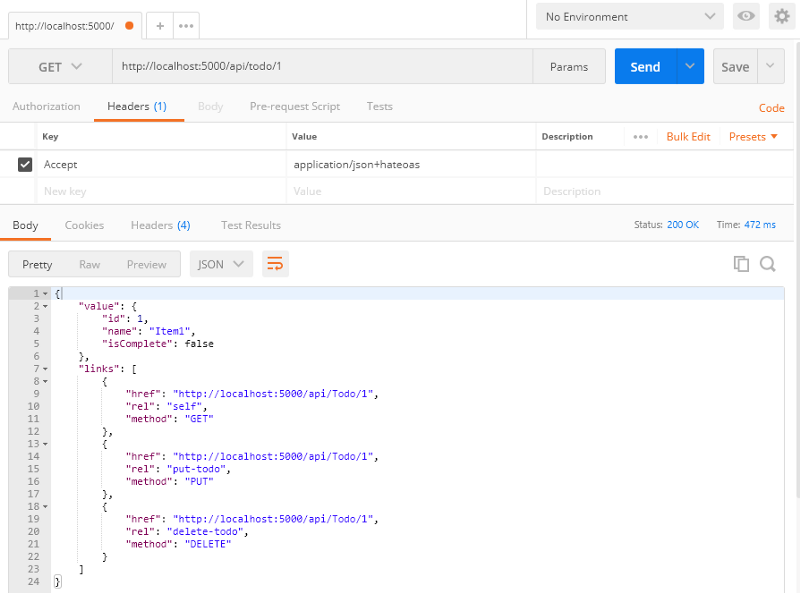
Yes, you, too, can take your APIs to the third level!
Easy navigation:
- Intro and Content Negotiation
- HATEOAS (this one, silly)
- Exceptions
- Concurrency
- Security
- Bonus (because I said it would be five): Swagger
Regards,

Part of the series: Five RESTFul Web Design Patterns Implemented in ASP.NET Core 2.0
- Five RESTFul Web Design Patterns Implemented in ASP.NET Core 2.0 Part 1: Content Negotiation
- Five RESTFul Web Design Patterns Implemented in ASP.NET Core 2.0 Part 2: HATEOAS
- Five RESTFul Web Design Patterns Implemented in ASP.NET Core 2.0 Part 3: Exceptions
- Five RESTFul Web Design Patterns Implemented in ASP.NET Core 2.0 Part 4: Optimistic Concurrency
- Five RESTFul Web Design Patterns Implemented in ASP.NET Core 2.0 Part 5: Security
- Five RESTFul Web Design Patterns Implemented in ASP.NET Core 2.0 Bonus: Swagger