
Implement a Progressive Web App (PWA) in your Static Website
Manifest, service worker and icons for the win.
Part of the series: From Medium to Hugo
The last step of my migration to Hugo was to implement a Progressive Web App (PWA for short). There are several reasons I wanted to implement a PWA:
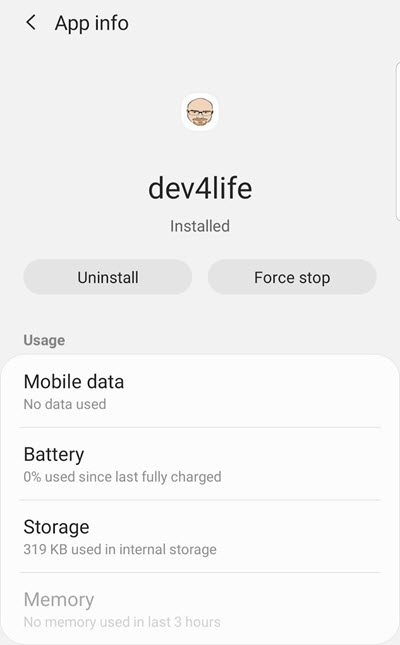
- It allows users (and prompts them) to install the website as an app on their mobile device.
- In the future, I can use push notifications to inform users of new content.
- It enables offline mode, so users can still browse and read when the Internet is down.
- It caches content to provide a faster, more responsive experience.
If those capabilities sound interesting to you, a PWA may be what you’re looking for!
What is a PWA?
Originally intended for mobile devices (I say originally because there is now support for desktop PWAs), a PWA is a special type of mobile application built using traditional web technologies like HTML, CSS, and JavaScript. All modern browsers support PWAs. They are called “progressive” because fundamentally they behave just like an ordinary web page in your browser, but once installed can progressively add new features like interacting with hardware and managing push notifications. The bare minimum for a PWA is a manifest and a service worker.
The Manifest
This is the manifest for Developer for Life.
{
"name": "Developer for Life",
"short_name": "dev4life",
"icons": [{
"src": "/appicons/favicon-128.png",
"sizes": "128x128",
"type": "image/png"
}, {
"src": "/appicons/apple-touch-icon-144x144.png",
"sizes": "144x144",
"type": "image/png"
}, {
"src": "/appicons/apple-touch-icon-152x152.png",
"sizes": "152x152",
"type": "image/png"
}, {
"src": "/appicons/favicon-196x196.png",
"sizes": "196x196",
"type": "image/png"
}, {
"src": "/appicons/splash.png",
"sizes": "512x512",
"type": "image/png"
}],
"start_url": "/",
"display": "standalone",
"orientation" : "portrait",
"background_color": "#FFFFFF",
"theme_color": "#FFFFFF"
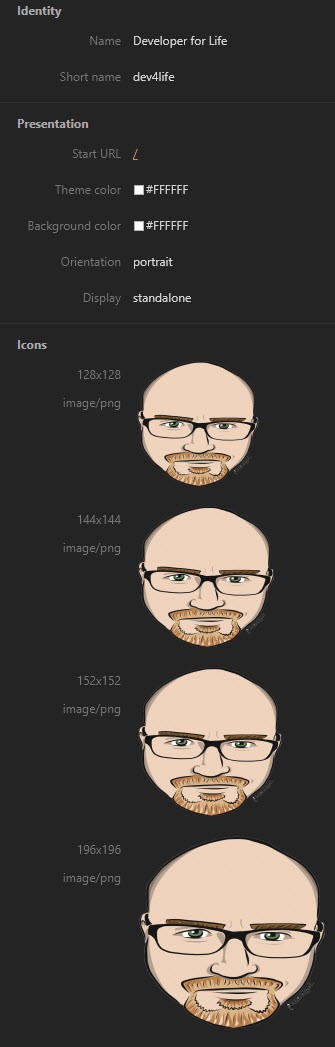
}It contains basic information such as what icons to display when the app is installed, colors to use, what the start page is and what the default orientation should be. It is installed at the root of your website. This link will download the manifest for Developer for Life: manifest.json.
Once your manifest is installed, you can view it in the developer tools under the “application” tab.
To generate the icons I used the free online tool favicomatic.com.
The Service Worker
The most critical part of a PWA is the associated service worker. This is a special JavaScript app that is registered by the browser or your mobile device to manage the website. For security, service workers are scoped to the domain they reside in. You cannot reference JavaScript from another domain for your service worker, and service workers are blocked from modifying the page directly. Instead, they work as a proxy to help marshal requests. If you place your service worker at mydomain.com/serviceworker/code.js it will only be able to access pages served underneath mydomain.com/serviceworker. For this reason, it is most often installed at the root.
I created a partial template that I reference in the footer. It contains this code:
if ('serviceWorker' in navigator) {
    navigator.serviceWorker
        .register('/sw.js', { scope: '/' })
        .then(() => {
            console.info('Developer for Life Service Worker Registered');
        }, err => console.error("Developer for Life Service Worker registration failed: ", err));

    navigator.serviceWorker
        .ready
        .then(() => {
            console.info('Developer for Life Service Worker Ready');
        });
}
The JavaScript registers the source code for the service worker (sw.js) and emits a console message when it is ready. The service worker I implemented acts mostly as a network proxy. It has a few primary tasks:
- It fetches and stores content in the browser’s cache. This is used to serve content when online for a faster connection, as well as to make content available offline.
- It serves a special offline page when you attempt to access non-cached content without a connection to the Internet.
- It refreshes content based on Time to Live (TTL) settings.
- If a new version is detected, it clears the old cache and starts fresh.
I based the source code on the “Offline First Service Worker” here:
From top-to-bottom here is a breakdown of the code:
const CACHE_VERSION = 2.3;I update this when the code changes to force the cache to refresh. Anytime the sw.js file changes, the browser updates the service worker to its new version.
const BASE_CACHE_FILES = [
    '/',
    '/js/jquery-3.3.1.min.js',
    '/404.html',
    '/offline',
    '/css/medium.css',
    '/css/bootstrap.min.css',
    '/css/additional.css',
    '/css/custom.css',
    '/manifest.json',
    '/images/logo.png',
    '/images/jumbotron.jpg',
    '/js/mediumish.js',
    '/blog',
    '/blog/2017-08-17_upcoming-talks/',
    '/static/about',
    '/privacy'
];

const OFFLINE_CACHE_FILES = [
    '/offline/'
];

const NOT_FOUND_CACHE_FILES = [
    '/404.html'
];

const OFFLINE_PAGE = '/offline/';
const NOT_FOUND_PAGE = '/404.html';
These files are grouped into assets that should be pre-cached, i.e. fetched and installed even if the user doesn’t visit those pages. This provides the basic offline experience. There is also a special cache for offline mode and pages not found. I chose to pick the resources that are needed to render the main page and the top-level pages available through navigation.
const CACHE_VERSIONS = {
    assets: 'assets-v' + CACHE_VERSION,
    content: 'content-v' + CACHE_VERSION,
    offline: 'offline-v' + CACHE_VERSION,
    notFound: '404-v' + CACHE_VERSION,
};

// Define MAX_TTL's in SECONDS for specific file extensions
const MAX_TTL = {
    '/': 3600,
    html: 43200,
    json: 43200,
    js: 86400,
    css: 86400,
};
This code establishes four separate caches to hold assets (images, CSS files, scripts), content (actual pages), the offline page, and the “not found” page. It also establishes default “Time to Live” in seconds. You can view the caches in your developer tools:
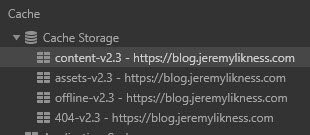
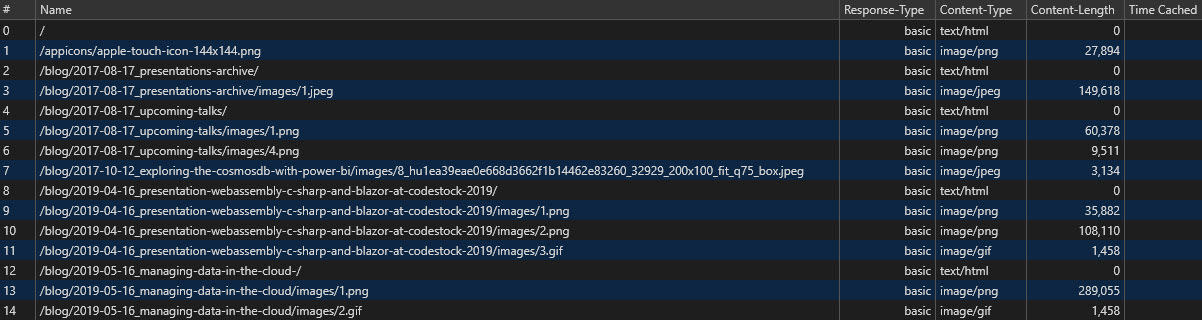
You can also drill into the content of each cache. This is my content cache:
The next few methods are internal utilities to do things like figure out the file extension and determine if the cache has expired. An important setting is the CACHE_BLACKLIST. I have it implemented as a simple function.
const CACHE_BLACKLIST = [
    (str) => !str.startsWith('https://blog.jeremylikness.com')
];
This ensures that I don’t cache content not served from my own website. I essentially ban anything not served under my domain. This means things like external advertisements won’t work in offline mode, which is perfectly fine.
⭐ Tip: You can add
localhostto be allowed, but I advise only doing this for testing. If you leave it permanently, you’ll have to manually refresh the page when editing new articles. The auto-refresh will serve the cached page instead of your latest edits. It’s easy enough toCTRL+F5to force a refresh, but I prefer to just removelocalhostwhen I’m done testing.
The installation method simply pre-loads the files to their respective caches:
function installServiceWorker() {
    return Promise.all(
        [caches.open(CACHE_VERSIONS.assets).then((cache) => {
            return cache.addAll(BASE_CACHE_FILES);
        }
            , err => console.error(`Error with ${CACHE_VERSIONS.assets}`, err)),
        caches.open(CACHE_VERSIONS.offline).then((cache) => {
            return cache.addAll(OFFLINE_CACHE_FILES);
        }
            , err => console.error(`Error with ${CACHE_VERSIONS.offline}`, err)),
        caches.open(CACHE_VERSIONS.notFound).then((cache) => {
            return cache.addAll(NOT_FOUND_CACHE_FILES);
        }
            , err => console.error(`Error with ${CACHE_VERSIONS.notFound}`, err))]
    )
        .then(() => {
            return self.skipWaiting();
        }, err => console.error("Error with installation: ", err));
}
The cleanupLegacyCache method is called when a new version is detected. It finds older caches and deletes them.
function cleanupLegacyCache() {

    let currentCaches = Object.keys(CACHE_VERSIONS).map((key) => {
        return CACHE_VERSIONS[key];
    });

    return new Promise(
        (resolve, reject) => {

            caches.keys().then((keys) => {
                return legacyKeys = keys.filter((key) => {
                    return !~currentCaches.indexOf(key);
                });
            }).then((legacy) => {
                if (legacy.length) {
                    Promise.all(legacy.map((legacyKey) => {
                        return caches.delete(legacyKey)
                    })
                    ).then(() => {
                        resolve()
                    }).catch((err) => {
                        console.error("Error in legacy cleanup: ", err);
                        reject(err);
                    });
                } else {
                    resolve();
                }
            }).catch((err) => {
                console.error("Error in legacy cleanup: ", err);
                reject(err);
            });

        });
}
The most complex code is the heart of the service worker. The app basically intercepts the fetch event that is used by the browser to load content and replaces it with a JavaScript proxy. The following pseudo-code explains how this works.
Intercept request for content
    Is content in cache?
        Yes, is content expired?
            Yes, fetch fresh content.
                If fetch was successful, store it in cache and return it
                If fetch was not successful, just serve cached content
            No, serve cached content
        No, fetch the content for the first time
            If fetch had OK status, store in cache and return
            Otherwise show and store "not found" page
            If fetch throws exception, show offline page
Done.
This is the offline first strategy and works well for content that doesn’t change often. Another popular implementation I’ve seen always fetches fresh content, even if it’s in the cache. The cached content is served immediately for responsiveness, but the fresh content is stored so the page will be current the next time it is visited.
Based on what I’ve shared so far you can probably figure out how to either directly access the offline page for this website/PWA or make it appear by disconnecting from the network. I tried to make it fun by including plasma and lightning.
Troubleshooting
You may find (as I did) there is a lot of troubleshooting involved with setting it up the first time. Most browsers should provide you with a view of your manifest and information about your service worker inside of developer tools. It’s usually under an application tab.
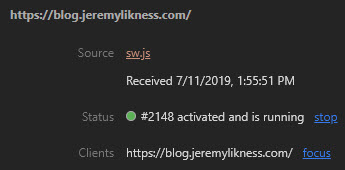
You can use this to force updates, unregister, etc. You can browse your cache and manually delete it to start fresh. Finally, the service worker code itself shows up in your source list and you can set breakpoints to debug like any other JavaScript code. It is sometimes useful to step through just to watch the page logic play out. The biggest issue I had was mistyping the path for pre-cached files that would cause an issue with registration and end up breaking functionality.
Lighthouse
Lighthouse is an open source tool that helps provide feedback about your website to improve the quality of your web pages. It assesses things like performance, accessibility, and SEO-readiness. It also can evaluate your PWA. Access Lighthouse in the audits tab under developer tools in Chrome and Insider’s Edge. I found it to be extremely helpful in setting up my PWA and ensuring all the requirements were met. It automatically tests a long checklist of features and provides a few manual checks you can perform on your own.
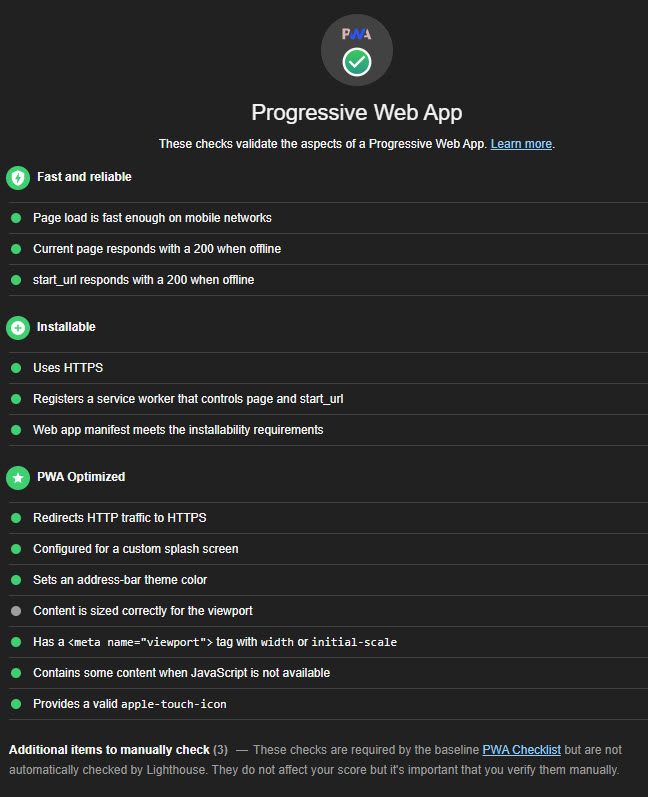
Note that some requirements may fail locally, such as enforcing HTTPS. I used it to get to 80% on my local machine, then finished testing after deploying it the first time on the actual secured domain.
Summary
PWAs make it easier for end users to access content. Done right, they provide a faster and more streamlined experience. I’m still surprised when I accidentally navigate to a local page with my server turned off and instead of getting a “page not found,” I find myself looking at the offline page. Hopefully, these steps make it clear for you to implement your own PWA. Next, I’m going to investigate notifications so I can alert users when new blog posts come out. Until then, I hope you enjoyed this series!
Regards,

Part of the series: From Medium to Hugo
- Migrate from Medium to Hugo
- More Hugo Migration Tips
- Dynamic Search in a Static Hugo Website
- Create a Content Security Policy (CSP) in Hugo
- Create an Article Preview in Hugo
- Implement a Progressive Web App (PWA) in your Static Website