
Introduction to Azure Cloud Shell
Learn how to access your fully configured Linux workstation from any browser to manage Azure resources and more.
Today I want to share a powerful tool that is built right into your web browser. Azure Cloud Shell is a shell you can access from the Azure portal. It attaches to a pre-configured workstation that has several tools and utilities already installed. It automatically authenticates to Azure so you are able to access your resources immediately, and can connect to a storage account to persist files between sessions.
The main advantage to using Azure Cloud Shell is the built-in access to the Azure Command Line Interface (CLI) without having to install anything locally on your machine or create a custom Virtual Machine (VM). This tool makes it incredibly easy to create and manage Azure resources. Although you can do most things through the portal UI, many developers find that the CLI is a fast and easy way to accomplish tasks with minimal keystrokes.
Getting Started
Access the Azure Cloud Shell by clicking on its icon at the top of your portal.

Or, you can launch it directly from ☁🐚 this link.
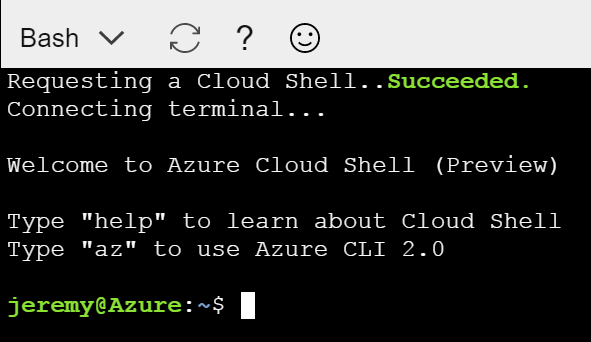
This will open a pane on the web page to host the shell. The first time you access the shell, you will be prompted to connect to a storage account. This storage account not only allows you to save files and information between sessions, but also will enable you to upload files to access from the cloud shell. Follow the prompts to set up storage, then wait for the cloud shell to start:
Now you are ready to issue commands. If you start with az you will see a list of all of the commands that are possible from the CLI. First, make certain you are working from the right subscription. To see a list of your Azure subscriptions, type:
az account list --output table
This produces a list of subscriptions (you may only have one) and indicates which one is set as the default (I added the yellow highlight in this example).

If you need to change the subscription, use the account set command. You can pass it the subscription name or the subscription id:
az account set --subscription=mysubscription
You may then re-list the subscriptions to confirm.
Resource Groups
Resource groups are logical partitions that you can think of as folders for related assets in Azure. Similar resources are typically grouped in the same resource group. You can deploy and destroy all of the assets in a resource group at once. You can also track cost by resource group.
List your resources by issuing the command:
az group list --o table
Next, create a new resource group. If you choose a different name, be sure to update it in the next step.
az group create --name container-group --location westus
You should see a result that, if the group creation was successful, contains this entry:
"provisioningState": "Succeeded"
Tip: Getting help in the Azure CLI. To get help in the CLI, simply add
--helpto any request. You can iterate through to more complex commands to get help for options. For example, to learn about resource groups you can issue the commandaz group --helpto see what commands are available, thenaz group list --helpto learn how thelistcommand works.
I made this short video to demonstrate these steps in action.
Run a Container
For the last step we’ll do something much more interesting than creating groups: we’ll run a Docker container. We’ll use the powerful new service named Azure Container Instances to accomplish this feat. Type the following command and hit enter (remember to update the resource group name if you changed it in the previous step).
az container create --name gosmall --image jlikness/gosmall --ip-address public -g container-group
This creates a container from the public Docker image I have for a tiny web server that simply outputs the text var id = <somenumber>;. After the container is created, you receive a status message that provides the public IP address that was provisioned:
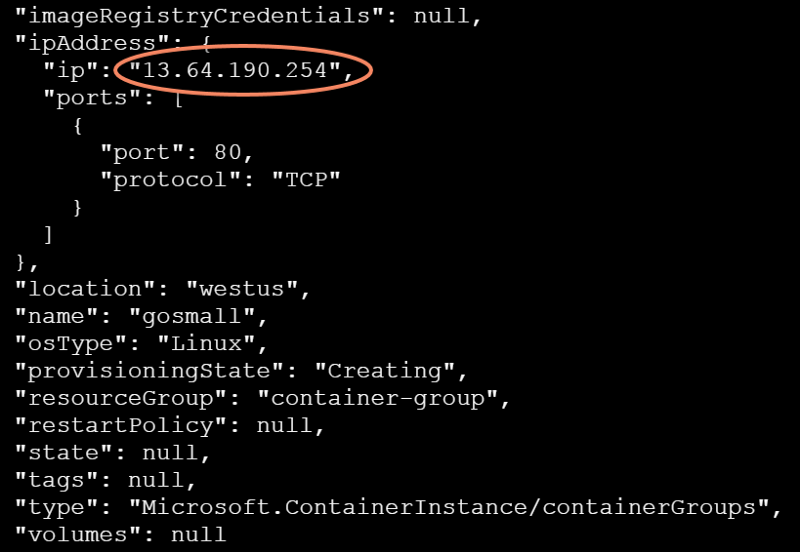
You can type the IP address in your browser to access it, or use the curl command from the shell, like this (the number it returns for you is random and probably not 606503):

Be sure to clean up when you’re done. You can delete most assets by specifying the name and the resource group, like this:
az container delete --name gosmall -g container-group
Another way is to delete the resource group, which will delete all related assets, including any ACI containers.
az group delete --name container-group
Make sure you truly want to delete everything inside the resource group before you confirm!
Conclusion
Today you learned how to access a powerful workstation that is accessible from any browser. Did you know the Azure Cloud Shell is even available from your phone when you install the Azure mobile app? Use the shell to quickly list, create, and manage resources without having to set up an environment or install any software of your own. What will the shell enable you to do next in the cloud?

Related articles:
- Custom Terminals and User Interface (UI) in Windows Terminal (Azure Cli)
- Deep Data Dive with Kusto for Azure Data Explorer and Log Analytics (Azure)
- Deploy WebAssembly from GitHub to Azure Storage Static Websites with Azure Pipelines (Docker)
- Docker Containers at Scale with Azure Web App on Linux (Linux)
- MongoDB on Windows in Minutes with Docker (Docker)
- The Year of Angular on .NET Core, WebAssembly, and Blazor: 2019 in Review (Azure)