
Create a Serverless Angular App with Azure Functions and Blob Storage
Learn how to create a fully serverless Angular TypeScript and Node.js app using Azure Functions and Azure Blob Storage.
As DevOps continues to blur the lines between traditional IT operations and development, platforms and tools are rapidly evolving to embrace the new paradigm. While the use of containers explodes throughout global enterprises, another technology has been rapidly gaining momentum. On Amazon AWS it’s referred to as AWS Lambda, on Azure it’s name is Azure Functions and in the Node.js world a popular option is webtask.io.
Read my new series about Angular with .NET that includes the new static website hosting from blob storage that doesn’t require a full path to launch the app!
The technology is referred to as “serverless” and is the ultimate abstraction of concerns like scale, elasticity and resiliency that empowers the developer to focus on one thing: code. It’s often easier to understand when you see it in action, so this post will focus on creating a completely functional Angular app with absolutely no provisioning of servers.
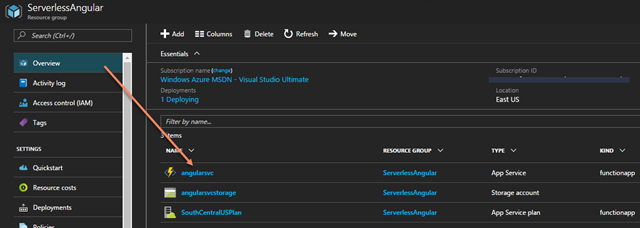
To follow along you’ll need an Azure subscription. If you don’t have one there is a free $200 credit available (in the U.S.) as of this writing. After you have your account, create a new resource group and give it a name. This example uses “ServerlessAngular.”
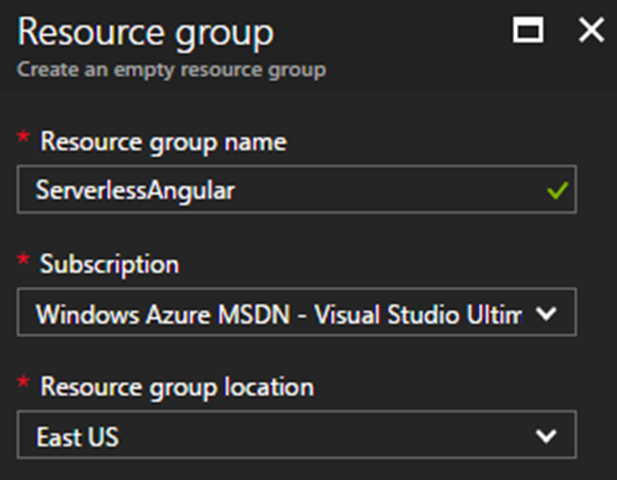
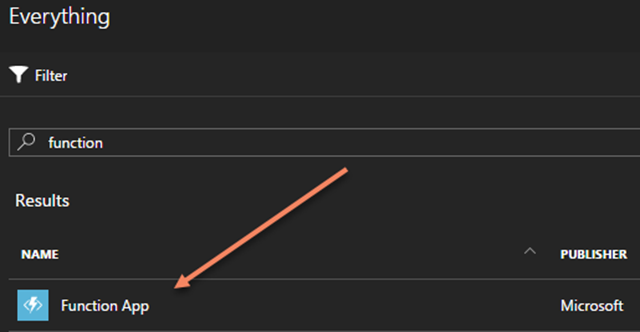
A resource group is simply a container for related resources. Groups make it easy to see aggregate cost of services, can be created and destroyed in a single step and are a common security boundary in the Azure world. Once the resource group is provisioned, add a resource to it. Use the add button, type “function” in the search box and choose “Function App.”
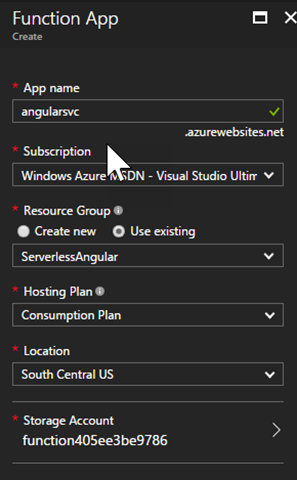
Now you can pick what the name of your function app is, choose the subscription it will bill against, assign it to a resource group, pick a location and associate it with a storage account. Here are some of the options I chose to create the app with the name “angularsvc.”
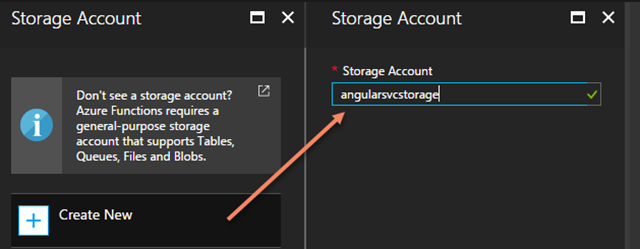
Function apps need storage, so tap the “Storage Account” option and use an existing account or create a new one. In this example I create one called “angularsvcstorage” to make it clear what the storage is for.
After you hit the create button, it may take a few seconds to several minutes to provision the assets for the function app. These include a service plan for the app, the storage, and the app itself. After everything is created, click on the function app itself to begin coding.
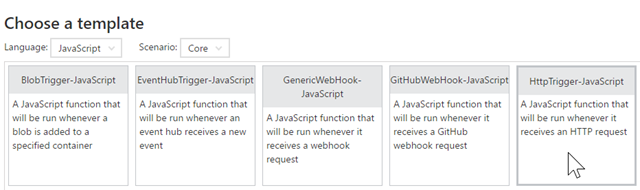
There are a few starter examples to choose from, but for this demo you’ll select, “Create your own custom function.” You can choose a language, scenario, and template to start with. I picked “JavaScript” for “Core” and selected “HttpTrigger-JavaScript.”
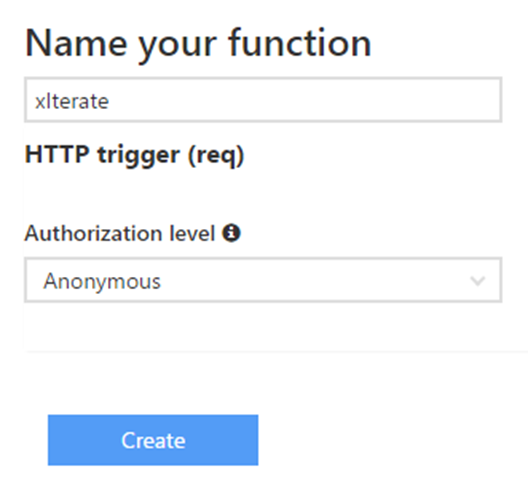
A function app may have multiple functions. For this example we’ll name the function “xIterate” and open it for anonymous consumption.
The app I’m using for this example is based on an Angular and TypeScript workshop I gave at DevNexus. The module “ 55-Docker” contains a sample app with an Angular project and a Node.js service that I adapted from containers for this serverless example. The app generates a bifurcation diagram. Here is the code for the function:
module.exports = function (context, req) {

    const badStatusMsg = "Please pass an r param on the query string with a value between 0 and 4";

    const badStatus = msg => ({
        status: 400,
        body: msg
    });


    context.log('JavaScript HTTP trigger function processed a request.');

    if (req.query.r) {
        let r = Number(req.query.r);
        if (r < 0 || r > 4.0) {
            context.res = badStatus(badStatusMsg);
        }
        else {
            let x = Math.random(), iterations = 100, result = [];
            while (iterations-- > 0) {
                let xn = x * r * (1.0 - x);
                result.push(xn);
                x = xn;
            }
            context.res = {
                status: 200,
                body: result.splice(10)
            };
        }
    }
    else {
        context.res = badStatus(badStatusMsg);
    }
    context.done();
};
Now you can click “save and run” to test it. The script expects a parameter to be passed, so expand the right pane, choose the “Test” tab and add a parameter for “r.”
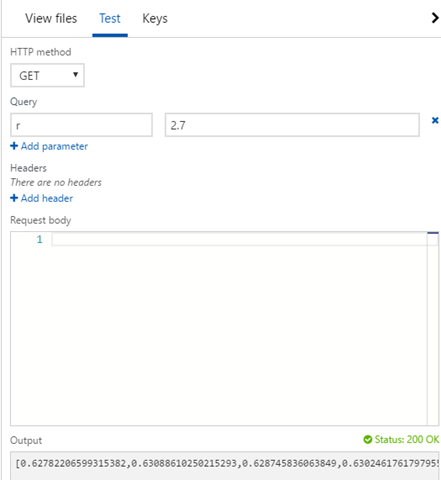
The screen capture shows the result of successfully running the function. You can see it returned a status code “200 OK” and an array of values.
To further test it, click the “get function URL” link in the upper right, and call it directly from your browser.
https://angularsvc.azurewebsites.net/api/xIterate?r=2.7
Now the function is ready to go. On a system with Node, NPM, and the latest Angular-CLI installed, execute this command to create a new Angular project:
ng new ng-serverless
After the project is created, navigate to its folder:
cd ng-serverless
Then generate a service to call our function:
ng g service iterations
Using your favorite code editor (mine is Visual Studio Code), open app.module.ts and add the import and edit the provider line to import the service:
import {IterationsService} from './iterations.service';

...
providers: [IterationsService],
...
Next, edit the iterations.service.ts file to implement the service. Use the function URL you created earlier. The service generates several values for “r”, calls the API to get the “x” iteration values, then publishes them as tuples back to the subscriber. Be sure to update the URL for the service to match your own.
import { Injectable } from '@angular/core';
import { Observable, Subject } from 'rxjs/Rx';
import { Http, URLSearchParams } from '@angular/http';

export interface IBifurcation {
  r: number;
  x: number;
}

@Injectable()
export class IterationsService {

  constructor(public http: Http) { }

  public generate(width: number): Observable<IBifurcation> {
    const rIterator = Observable.range(0, width - 1).delay(1).map(x => (4.0 * x) / width),
      sync = new Subject<IBifurcation>();

    rIterator.subscribe(r => {
      const params = new URLSearchParams();
      params.set('r', r.toString());
      this.http.get('https://angularsvc.azurewebsites.net/api/xIterate', {
        search: params
      }).subscribe(res => {
        const result = res.json();
        if (result && result.length) {
          result.forEach(x => sync.next({ r, x }));
        }
      });
    });
    return sync.asObservable();
  }

}
Edit the app.component.html template to add a canvas that will host the diagram:
<h1>
  {{title}}
</h1>
<canvas width="1000" height="500" #canvas></canvas>
Finally, edit app.component.ts to call the service and populate the diagram.
import { Component, ViewChild, ElementRef, OnInit } from '@angular/core';

import { IterationsService, IBifurcation } from './iterations.service';

@Component({
  selector: 'app-root',
  templateUrl: './app.component.html',
  styleUrls: ['./app.component.css']
})
export class AppComponent implements OnInit {
  title = 'app works!';

  private width: number;
  private height: number;
  private twoDContext: CanvasRenderingContext2D;

  @ViewChild('canvas')
  public canvasElem: ElementRef;

  constructor(public generator: IterationsService) { }

  ngOnInit() {
    const canvas = <HTMLCanvasElement>this.canvasElem.nativeElement;
    this.width = canvas.width;
    this.height = canvas.height;
    this.twoDContext = canvas.getContext('2d');
    this.twoDContext.fillStyle = 'rgba(32, 64, 128, 0.75)';
    this.generator.generate(this.width).subscribe(res => this.plot(res));
  }

  plot(point: IBifurcation) {
    if (this.twoDContext) {
      const x = this.width * (point.r / 4.0);
      const y = Math.floor(this.height - (point.x * this.height));
      this.twoDContext.fillRect(x, y, 2, 2);
    }
  }
}
Now, the app is ready to run. Use the Angular-CLI to launch a local server:
ng serve
And, if it doesn’t open for you automatically, navigate to the local port in your web browser:
You’ll see the app loads but then nothing happens. If you open the console, it will be riddled with errors like this:
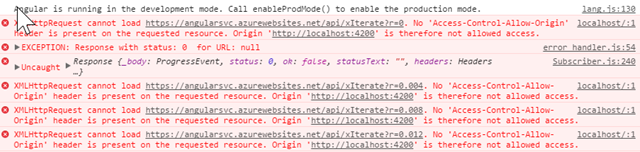
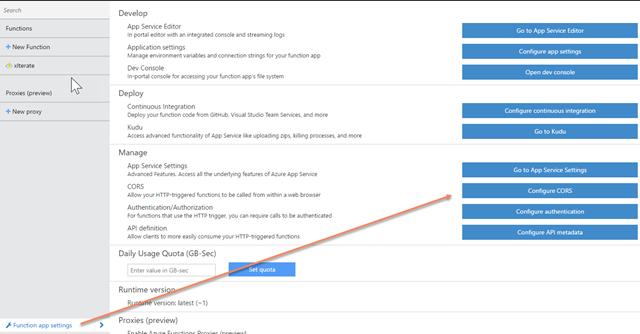
The problem is that Cross Origin Resource Sharing (CORS) hasn’t been configured for the function, so for security reasons the browser is blocking requests to the Azure app function from the localhost domain. To fix this, open the function app back up in the Azure Portal, tap “Function app settings” in the lower left and choose “Configure CORS.”
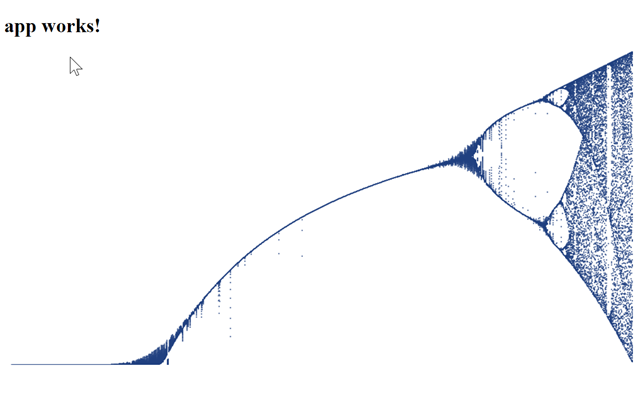
Add http://localhost:4200 to the list of allowed domains, save it, then refresh your browser. If all goes well, you should see something like this:
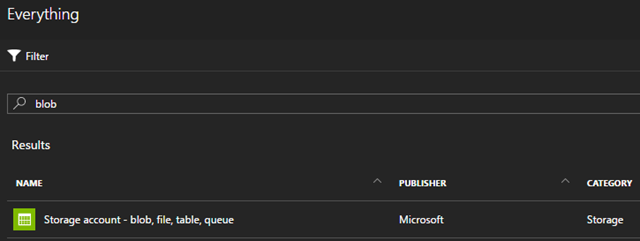
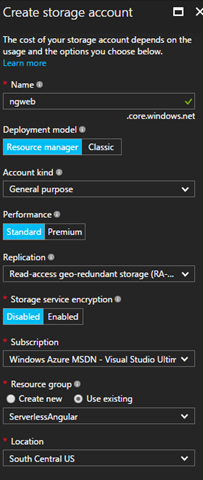
That’s great — now you have a serverless API, but what about the website itself? Fortunately the Angular app itself is completely clientside so it can be exported as a static site. Let’s configure Azure Blob Storage to host the website assets. Add a new resource to the existing resource group. Search for “blob” and choose the “Storage account” option.
Give it a name like “ngweb”, choose “Standard”, pick a replication level (I chose the default), and pick a region.
Once this storage is provisioned, tap on “Blobs” for the blob service. The blob service is segmented into named containers, so create a container to host the assets. I named mine “bifurc” for the app. The access type is “Blob.”

After the container is provisioned, you can choose “container properties” to get the URL of the container. Copy that down. In your Angular project, generate an optimized production build:
ng build --prod --aot
This will build the static assets for your application in the “dist” folder. Open dist/index.html and edit the file to update the base URL. This should point to your container (the final slash is important):
<base href="https://ngweb.blob.core.windows.net/bifurc/">
Back in the Azure portal, the container provides an “upload” option to upload assets. Upload all of the files in “dist” as “block blob” until your container looks something like this:
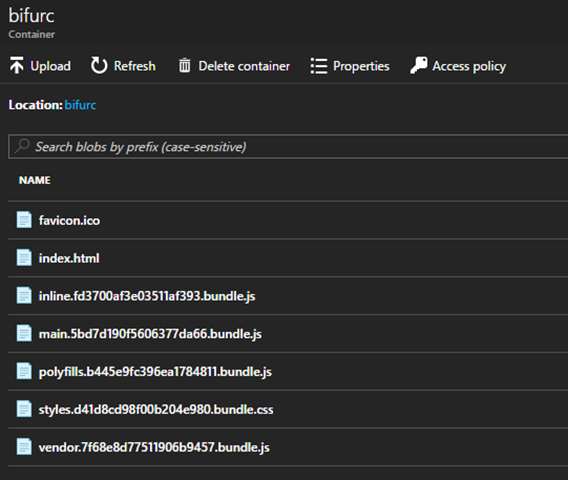
You can either navigate to the container URL you saved earlier or click on index.html and copy its URL. You should see the app try to load, but it will fail. CORS strikes again! Head back over to the function service and add the blob storage domain (just the domain, the path is not necessary) to the list of allowed servers. For this example, I added https://ngweb.blob.core.windows.net/.
Eureka!
At this point you should have a working application. If you want to host this for production and give it a more user-friendly name, you can use a CNAME entry in DNS to point a custom domain name to blob storage.
Of course, this demonstration only scratched the surface of what is possible. You can build authentication and authorization into Azure Functions, securely store secrets like database credentials, trigger functions based on resource changes (such as running one when a SQL table is updated or a file is uploaded into blob storage) and much more.
In just minutes developers can now provision a highly elastic, scalable, and resilient web application without having to worry about how it is load-balanced. Your boss will give you extra points for saving cash because the functions and blobs are charged based on usage — no more ongoing costs to keep a VM running when it isn’t being used. All of these resources support deployment from a continuous deployment pipeline and in Azure you can create an automation script to generate a template for building out multiple environments like Dev, QA, Staging, and Production.
Intrigued? Learn more about Azure Functions here.
Enjoy your new super powers!

Related articles:
- Azure Cosmos DB With EF Core on Blazor Server (Azure)
- Convert Modern JavaScript to Legacy (ECMAScript 5) in Minutes (Typescript)
- Serverless HTTP With Durable Functions (Azure Functions)
- The Year of Angular on .NET Core, WebAssembly, and Blazor: 2019 in Review (Azure)
- TypeScript for JavaScript Developers by Refactoring Part 1 of 2 (Nodejs)
- TypeScript for JavaScript Developers by Refactoring Part 2 of 2 (Nodejs)